|
|
|
![]()
![]()
![]()
|
|
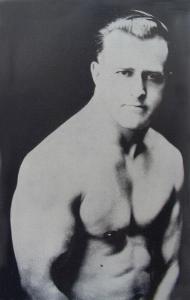
EARLE
E. LIEDERMAN
America's Leading Director of Physical Education AUTHOR AND PUBLISHER OF "SCIENCE OF WRESTLING AND ART OF JIU JITSU" "MUSCLE BUILDING" "HERE’S HEALTH" "ENDURANCE" "SECRETS OF STRENGTH" "SEXUAL GUIDANCE" "HIDDEN TRUTH ABOUT SEX" ETC., ETC. 305-309 BROADWAY, NEW YORK CITY TELEPHONE WORTH 6714-4175 |
![]()
First Week
I am giving you a few exercises to start off with for the first week and until your exerciser arrives. These preliminary exercises require no apparatus, and I give them to you so that you will not lose any time while you are waiting for the progressive exerciser. The parcel post at times is very slow, and you may not receive the exerciser for week or so. These exercises, I have selected as best adapted for your case, and they will get your muscles in shape for the work with the exerciser. Keep at them until your exerciser arrives.
The order in which you perform these exercises makes no difference as far as development is concerned, but I suggest you do all of the leg work first and get done with it, for you will find that the leg work is not as pleasant to do as the upper body work, because It requires more lung power to execute it. I suggest, after you finish your leg work, that you take about ten or more deep long breaths, for you will probably be winded, and It is then when deep breathing does you the most good when you are out of breath.
After you finish your drill, I also want you to take about ten or more deep long breaths. Fill your lungs to their capacity and throw your shoulders back, This deep breathing will not only increase the size of your chest, but it will give you more energy and also purify your blood. In fact, every time you think of it, while outdoors, take deep long breaths, You really cannot get too much fresh air into your lungs.
Now I want you to just place yourself in my hands and leave everything to me, and I know you will be more than satisfied with results. I want you to have full confidence in me and in what I tell you from week to week, for you will find me absolutely frank with you in every way, and I expect you to be the same with me, by faithfully following my instructions to the very best of your ability, and also to exercise every day. This you MUST do. I am a great believer in daily exercise, and I practice what I preach. The best time for this I find, is In the mornings, upon arising, for then you get done with it, whereas if you postpone it until evening, something may arise to prevent it and then a day is lost, and each day counts. You will realize the importance of this after you have been working a few weeks under my guidance. Of course, if you really cannot do your drill in the mornings, why any other time of the day will do just as well, as far as results are concerned, but be sure never to skip one day.
EXERCISE #1 - Stand erect. Then squat down until your knees are bent as far as possible and you are practically sitting on your heels. Then rise up again until your legs are straight. This is called the common deep knee bending exercise. The proper way to perform this exercise is when you start to rise up or straighten your legs, to push away from the floor as vigorously as you can. When you have risen, stiffen your knees, or in other words straighten your legs by pushing backwards at the knees. Each time you rise from the squatting position rise as if your body weighed twice as much as it does. It is not what you do but how you do it that counts in exercising. Always exercise the hardest way, for the hardest way will develop you the quickest. This exercise needs no illustration, but I will illustrate it later on in your course, when I will give it to you in a much harder way, according to how you progress in strength. This exercise will develop the muscles in front of your thighs, and give a curve to the upper leg. Do this exercise until you feel slightly tired in the thighs.
EXERCISE #2 - Rise up and down on your toes, and do this on one leg at a time. Rise as high as you possibly can until you feel a strain in the calf of the leg. The calf of the leg is quite a hard part of the body to develop, as you are constantly walking and using the muscles so much that they are hardened against exercise, and it is only by forcing them and straining them to their limit, that results will be obtained. If you will perform this exercise on a book, as shown in photo #5, you will obtain better results and also tire your muscles out quicker. Do this exercise until your calf is tired, and repeat with other leg.
EXERCISE #3 - Grasp right heel with right hand, as shown in photo #11. Then while holding heel with right hand, raise the leg as high as you possibly can and then straighten knee as shown in photo #10. It is this last part, the straightening of the knee that does the work. This exercise will develop the biceps of the leg, or the muscles behind the thigh. These muscles are important as they give a very pleasing appearance to the thighs. Do this exercise at least 10 times, and then repeat with other hand and leg.
EXERCISE #4 - Stand with toes pointed directly front and with feet about 12 inches apart. Then bend knees without lifting the heels from the floor keeping body erect. When you feel as though you have bent them as far as they will go, try to bend them farther. It is the last strain that benefits you. This is an excellent exercise for the muscles of the shin, and will give the lower leg a rounder shape. This needs no illustration. Do this exercise about 15 or more times.
EXERCISE #5 - Roll the head around, turn it to the right and left, bend it from side to side, bend it forward and backward, etc. I give you this to prepare you for some heavier neck work which I will give you later. Do not do these neck movements jerkily, for if you do, you may get a kink in the neck that will annoy you for several days. Neither should you keep your eyes open while performing these movements, until you become used to them a bit, for in doing so, it may cause dizziness. If you should experience any dizziness while doing this neck work, just stop for a few moments and rest. Pay a lot of attention to these movements for you know a well developed neck is very pleasing to look at. Perform 15 to 25 times. No illustration
EXERCISE #6 - Lie flat on your stomach on the floor and place your hands on each side of your chest, palms on the floor. Then push up until your arms are stiff, as shown in photo #12. Be sure to keep the whole body stiff throughout this exercise. The only parts of your body that should touch the floor are your toes and hands. This is called the push-up, and is one of the greatest exercises known for the pectoral (chest) muscles. It also develops the triceps (the muscles behind the upper arms) and the abdominal muscles. Do this exercise just as many times as you can, and. perform each count vigorously.
EXERCISE #7 - Hold arms in position as shown in photo #8. You will note the right hand is closed and the left hand is pressing against the right wrist. The object is to bring the right fist to the right shoulder and at the same time resisting strongly with the left hand and arm. The harder you resist, the more benefit you will get out of this exercise. When your right fist reaches the height of shoulder, relax completely and start over again from first position. Do not push the right arm down, but let it drop without any effort. This will give the blood a chance to flow, more freely. If you keep your arm tensed all the time, the blood does not. have a chance to flow properly. Do the same with the left arm. This exercise is a fine one for the biceps and it will prepare you for some work with the progressive exerciser. Continue this exercise until your upper arm is tired. Be sure to make complete contractions and extensions each time. That means, when you start the movement, do not start where the hands are shown in the photo of myself, but start with the right arm straight and then bring the arm up just as far as it will go.
EXERCISE #8 - Grasp the right arm as shown in photo #9. Then try to push the right arm across the body while keeping it stiff. After you have pushed it across your body, relax for a second, and then bring the arm back to starting place again. While you are performing this movement, you should resist strongly with the muscles of the left arm. After you have done this about 10 to 15 times, reverse and do the same with the left arm. This exercise will broaden your shoulders, and also prepare you for some fine muscle building work with the progressive exerciser next week.
![]()